University of Virginia Library

Search this document 


collapse section1. 


collapse section2. 


collapse section3. 


collapse section4. 


collapse section5. 


Trussing with Guy Wires.


collapse section6. 


collapse section7. 


collapse section8. 


collapse section9. 


collapse section10. 


collapse section11. 


collapse section12. 


collapse section13. 


collapse section14. 


collapse section15. 


collapse section16. 


collapse section17. 


collapse section18. 


collapse section19. 


collapse section20. 


collapse section21. 


collapse section22. 


collapse section23. 


collapse section24. 


collapse section25. 


collapse section26. 


collapse section27. 


 28. 

Trussing with Guy Wires.

The next move is to "tie" the frame together rigidly by the aid of guy wires. This is where the No. 12 piano wire comes in. Each rectangle formed by the struts and stanchions with the exception of the small center one, is to be wired separately as shown in the illustration. At each of the eight corners forming the rectangle the


41

ring of one of the eye-bolts will be found. There are two ways of doing this "tieing," or trussing. One is to run the wires diagonally from eye-bolt to eye-bolt, depending upon main strength to pull them taut enough, and then twist the ends so as to hold. The other is to first make a loop of wire at each eye-bolt, and connect
illustration

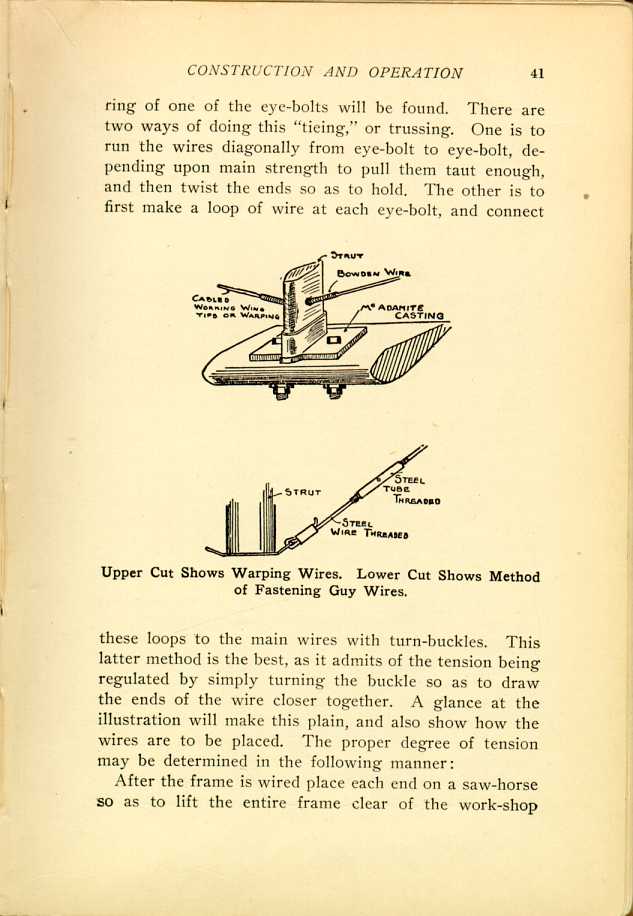
Upper Cut Shows Warping Wires. Lower Cut Shows Method of Fastening Guy Wires.

[Description: Black and white illustration: Two diagrams showing attachment of wires.]
these loops to the main wires with turn-buckles. This latter method is the best, as it admits of the tension being regulated by simply turning the buckle so as to draw the ends of the wire closer together. A glance at the illustration will make this plain, and also show how the wires are to be placed. The proper degree of tension may be determined in the following manner:

After the frame is wired place each end on a saw-horse so as to lift the entire frame clear of the work-shop


42

floor. Get under it, in the center rectangle and, grasping the center struts, one in each hand, put your entire weight on the structure. If it is properly put together it will remain rigid and unyielding. Should it sag ever so slightly the tension of the wires must be increased until any tendency to sag, no matter how slight it may be, is overcome.